Description
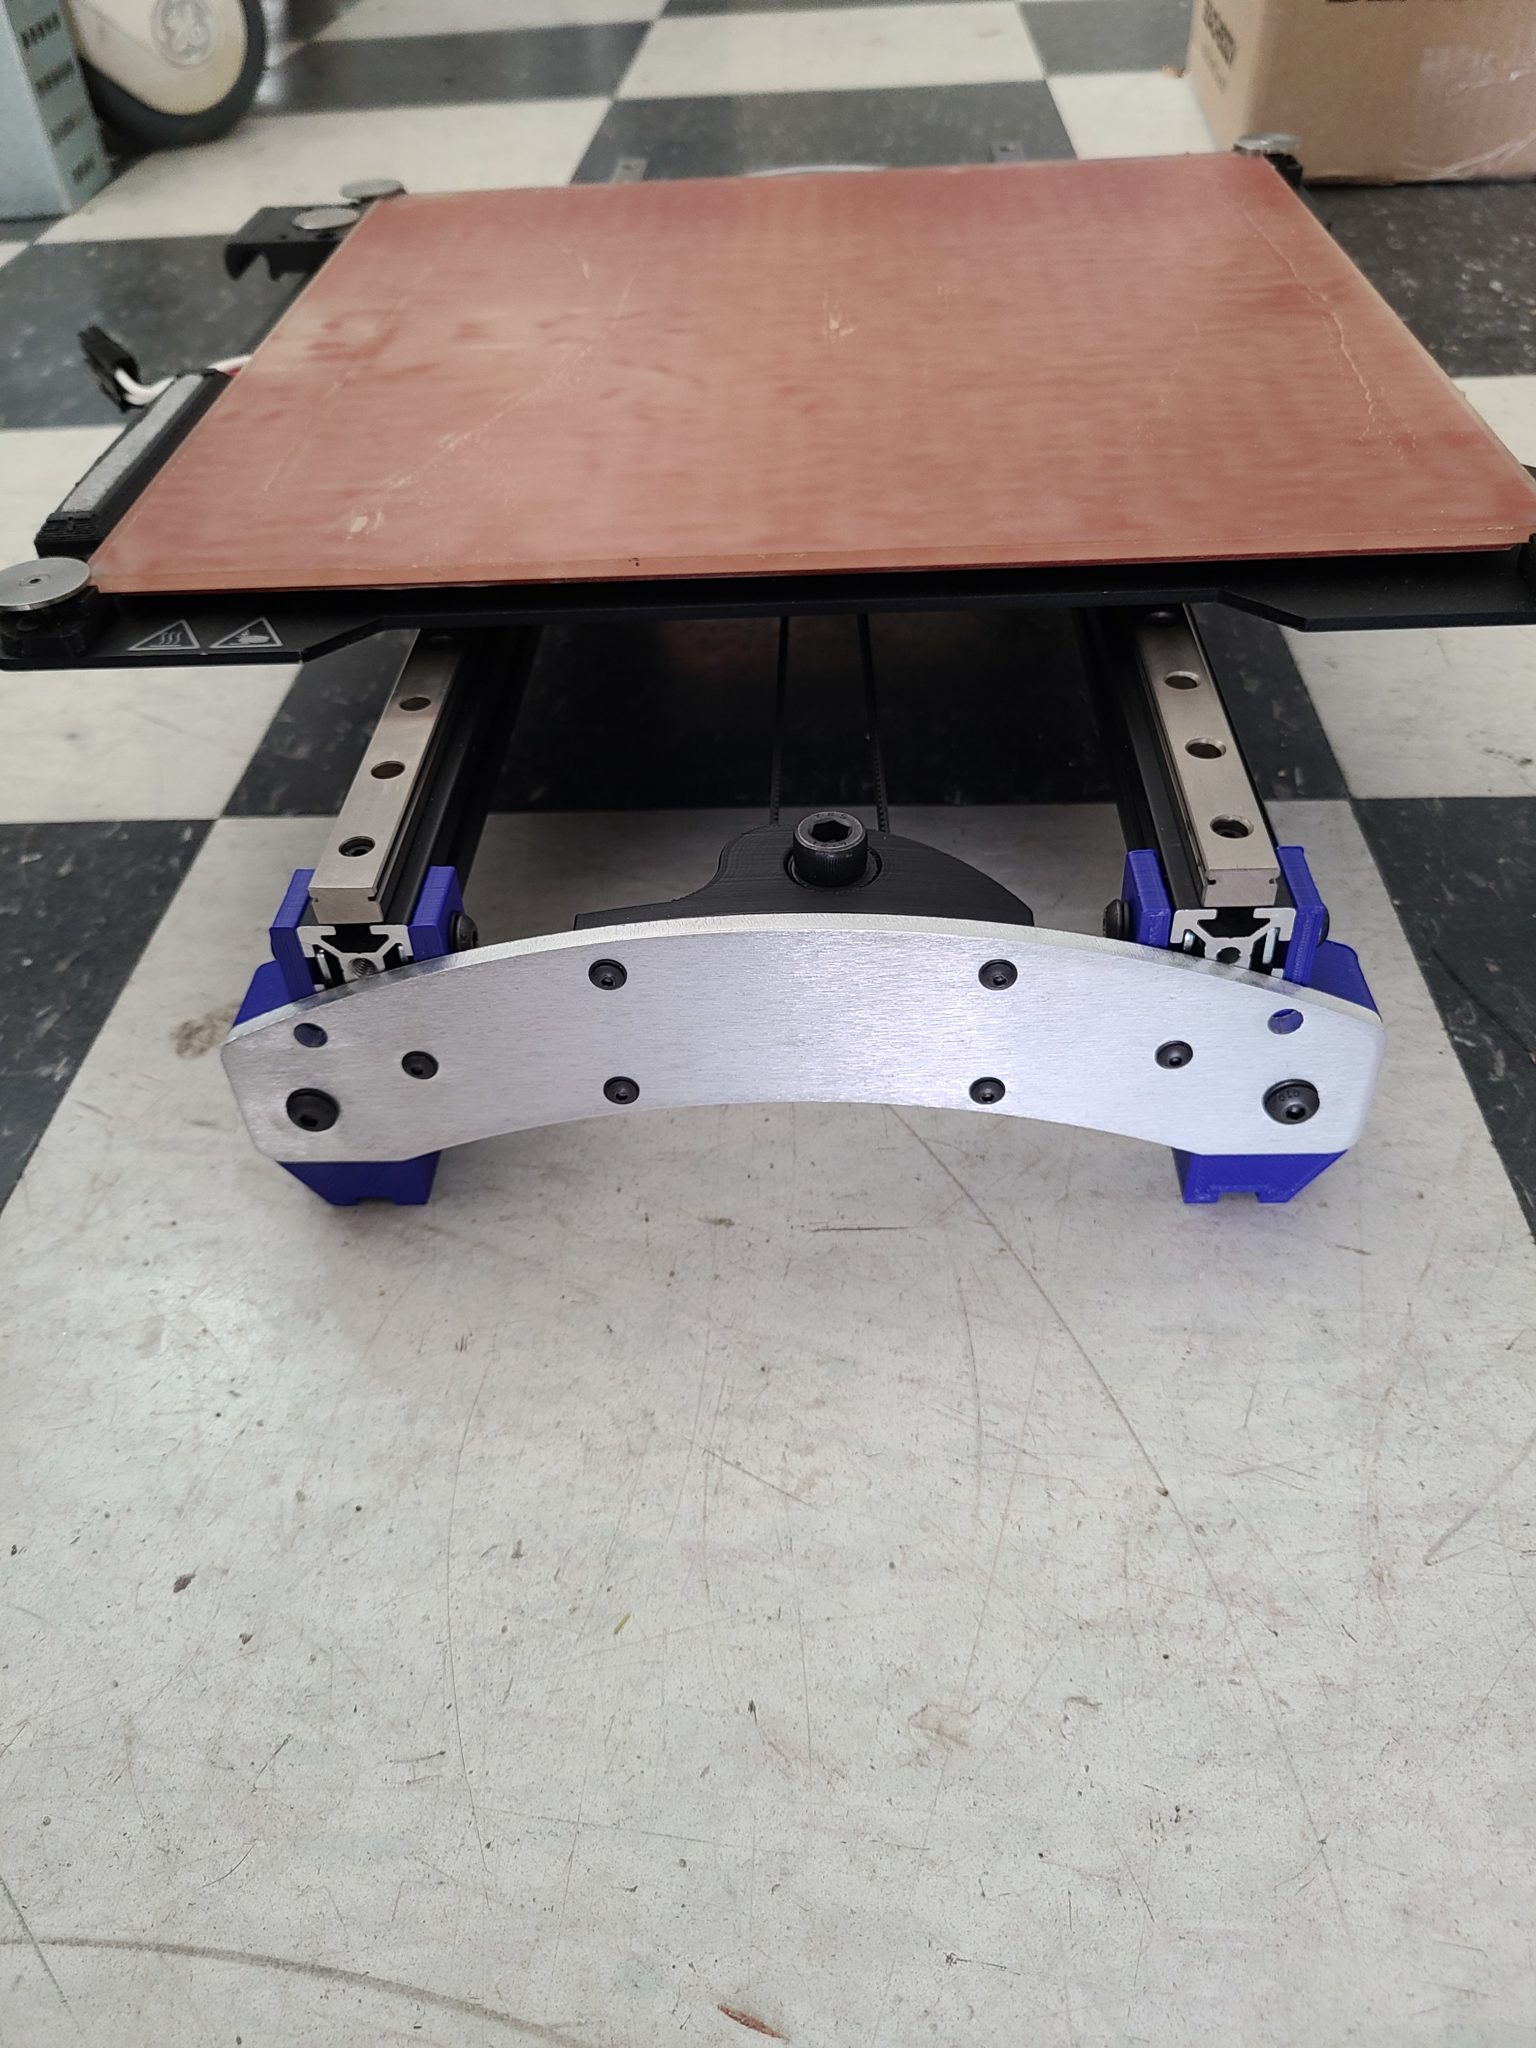
This MGN12 y axis modification will stiffen your y Axis up in both horizontal and vertical play. You should notice better control on the y axis due to less play.
This TAZ Y Axis Linear Rail Mod kit comes with the following parts:
- One set of linear rails with dual carriages
- One set of 20×20 extrusions
- 4 3d printed Y Corners
- 3d printed drill guides for the Y end Plates for TAZ 5/6
- 3d printed drill guides for the aluminum bed plate(TAZ 5 are different plates then the TAZ 6/WH)
- Hardware to mount the linear rails to the 20×20 extrusions
- Hardware to mount the rails to the aluminum bed plate
- Hardware to mount the extrusions to the extrusions to the Y axis feet/Y plates
- For the Workhorse, Raw Aluminum Modified Y end plates. You can leave or paint to match.
- TAZ Pro kit will have the end plates, and also include bump stops for the end of the linear rails. for home positioning.
This kit will take around 2-3 hours to put together and get everything aligned and moving smoothly. Will come with instructions on how to install the kit onto your printer.
The linear rail modification is available in the following printers: LulzBot TAZ 5, 6, LulzBot Workhorse and now TAZ Pro!!!


tapaul70 (verified owner) –
This upgrade was super simple to do, looks great and works great. I coupled this upgrade with the TAZ X Axis Linear Rail upgrade from Itworks3D and It WORKS! Great! Customer support is also super and quick to respond!
Kris Flynn (verified owner) –
ABSOLUTELY AMAZING! My Taz 6 hasn’t printed this nice since I bought it new when it came out! This is an absolute must have upgrade and if you have any questions their customer support goes above and beyond to help. Next I’ll get the X axis upgrade!
aggieliberal (verified owner) –
I don’t know why I waited so long for this linear rail upgrade. I’ve always noted a little bit of flex in the build plate – but NO MORE. This upgrade makes the bed an absolutely solid foundation. Easy to clean, and honestly, easier than I thought to install. Instructions were very clear. I was admittedly nervous drilling into the build plate and end plate, but the drill guides were spot-on.
Note: I own a Taz 5, so my stock rubber feet didn’t work with the design. I imagine the stock Taz6 feet are what the legs that get replaced are designed around. So adding new feet from openbuilds created a bit of a height different (lifting the Y axis) about 3 or 4 mm higher than it previously settled on the main gantry frame. (The reason is because they sit flush with the foot, and did not fit into the embedded design. So there is a gap about 3-4mm under those feet.) HOWEVER, there’s an easy garage solution: I added 2 washers under each rubber foot on the main gantry, which lifted the rest of the printer to match the height of the Y axis.
I also got the X-axis linear rail and highly recommend them together. I feel like I have breathed new life into my 7 year old printer.